My Favorite-Super-Easy DIY Image Transfer Technique
My Favorite-Super-Easy
DIY Image Transfer Technique
Where the Possibilities are Endless
Where the Possibilities are Endless
If you've been painting furniture for awhile--or maybe you are new to furniture painting, but a member of Pinterest or Facebook Furniture Painting forums--you've probably seen furniture embellished with image transfers. There are some lovely products out there in the "rub on" image transfer realm, especially from two major suppliers of such images--Iron Orchid Designs (IOD) and ReDesign by Prima. I truly love what these two companies have to offer, and I have used their high quality, easy-to-apply transfers many times with great results. But...and there is always a but...the designs and available sizes of transfers from those companies are limited and the products can be somewhat expensive, especially if you really like the look of image transfers on furniture and use them often.
So what is a furniture artisan like yourself to do? Well, you can make your own Do-it-Yourself (DIY) image transfers and apply them to furniture with my absolute favorite-super-easy image transfer technique that will give you a clean transfer without leaving paper residue behind. What do I mean about paper residue, you ask? I will explain that later when I talk about the technique.
 |
| Image Transfer Photocopied from a Swatch of Upholstery Fabric |
 |
| Credit: The Graphics Fairy |
Once you find the image you want to transfer, especially those with words, it is important that you scan it into a computer and flip it so that it looks backward to you (but can be read correctly in a mirror). The best way to do this is to copy the image on standard letter-sized paper, (which might mean reducing it on the copy machine to get it to that size) and saving it as a digital image (or scan it). Then, you can pull the image into your computer's photo or publishing software to flip it. Once you have completed that step--and if you are happy with your image being letter size--then you can bypass this next paragraph and move right to the "Secret to My Favorite-Super-Easy DIY Image Transfer Technique."
 |
| Credit: The Graphics Fairy |
 |
| Credit: www.blockposter.com |
The Secret to My-Favorite-Super-Easy DIY Image Transfer Technique
I mentioned earlier that my favorite transfer technique provides (typically) a clean transfer without paper residue. By point of comparison, you should know that there are a number of image transfer methods (The Graphics Fairy shares a ton of them), but the most common one involves gluing down printed bond (i.e. copier) paper with a transfer medium, and then wetting and rubbing off the pulp from the back of the paper to reveal the image on your furniture surface. The main issue with this method is that you almost never get all of the pulp removed, and your image will dry with a light haze over it--or you will over-rub the pulp off the image and damage it.

Instead of using regular bond paper, my favorite technique uses the shiny side of spent label paper. That means you take a sheet of Avery labels (or less expensive generic equivalent that does not have any perforation), and you remove all of the labels leaving only the carrier sheet, which has a slick shiny side and a matte side. If your laser printer cooperates, you can print your block poster (or letter-sized) flipped image directly onto the spent label paper (image must be on the shiny side). If your laser printer doesn't like the spent label paper's thinness and jams, then use a copy machine to copy the image on the shiny side of the label paper.
The beauty of this transfer “carrier” is that the ink sits on top of the shiny surface rather than bleeding in the paper’s fibers, so when you remove the carrier paper after the image has transferred onto your furniture, it requires no rubbing off of the paper pulp, and leaves no paper residue. For this reason, it is important that you handle the printed label paper carefully, so as not to scratch or rub the image off before you make your transfer.
Applying your Image
Once you have your flipped image printed on the shiny side of the label paper, it is time to apply it. You can apply it as a whole sheet(s) covering the entire surface area of the furniture, or you can carefully cut out the image and apply it in sections. If you have a larger image made with multiple blocks, you will want to carefully piece together the trimmed blocks making sure that that image segments perfectly line up. Tape the back of the paper blocks together at the seams with masking tape before beginning the next step.
Next you will apply the image to the furniture with a TRANSFER MEDIUM GEL. I have used Liquatex in matte finish (which you can purchase at craft stores) with great success. Autentico also has an "Art Medium" transfer gel , as do other premium paint lines. Mod Podge can work (but I prefer that for decoupage). I've also seen videos of someone using polyacrylic top-coat as the medium (though I've never tried this last one, so I cannot vouch for it). Contrary to the instructions on the transfer medium gel, which say to brush the transfer medium onto the image itself, I prefer to brush a thin later of the gel over the façade of the furniture surface where it will be applied. This method also avoids prematurely activating the ink of the transfer. The one drawback of this is that you transfer gel will dry with a little bit of a sheen (even the matte), so you should either cover the entire surface area of the furniture facade to keep the sheen it consistent, or you should cut out your image and clean off excess transfer gel around it, after it is placed down.
Next you will apply the image to the furniture with a TRANSFER MEDIUM GEL. I have used Liquatex in matte finish (which you can purchase at craft stores) with great success. Autentico also has an "Art Medium" transfer gel , as do other premium paint lines. Mod Podge can work (but I prefer that for decoupage). I've also seen videos of someone using polyacrylic top-coat as the medium (though I've never tried this last one, so I cannot vouch for it). Contrary to the instructions on the transfer medium gel, which say to brush the transfer medium onto the image itself, I prefer to brush a thin later of the gel over the façade of the furniture surface where it will be applied. This method also avoids prematurely activating the ink of the transfer. The one drawback of this is that you transfer gel will dry with a little bit of a sheen (even the matte), so you should either cover the entire surface area of the furniture facade to keep the sheen it consistent, or you should cut out your image and clean off excess transfer gel around it, after it is placed down.
 Then carefully place the image down on your furniture surface and smooth it out—first with your hands and then with the side of a credit card to get the bubbles out and ensure the image is firmly adhered to the furniture piece. Do not lift the image to reposition it, as it will have already started transferring at this point. Cover the entire surface of the carrier paper with heavy books and wait for 24 hours. Before applying your weight, you can also run a heat gun if you have one on hand (not a hair dryer) over the back of the paper to accelerate drying, being careful not to get too close to the paper.
Releasing Your Image
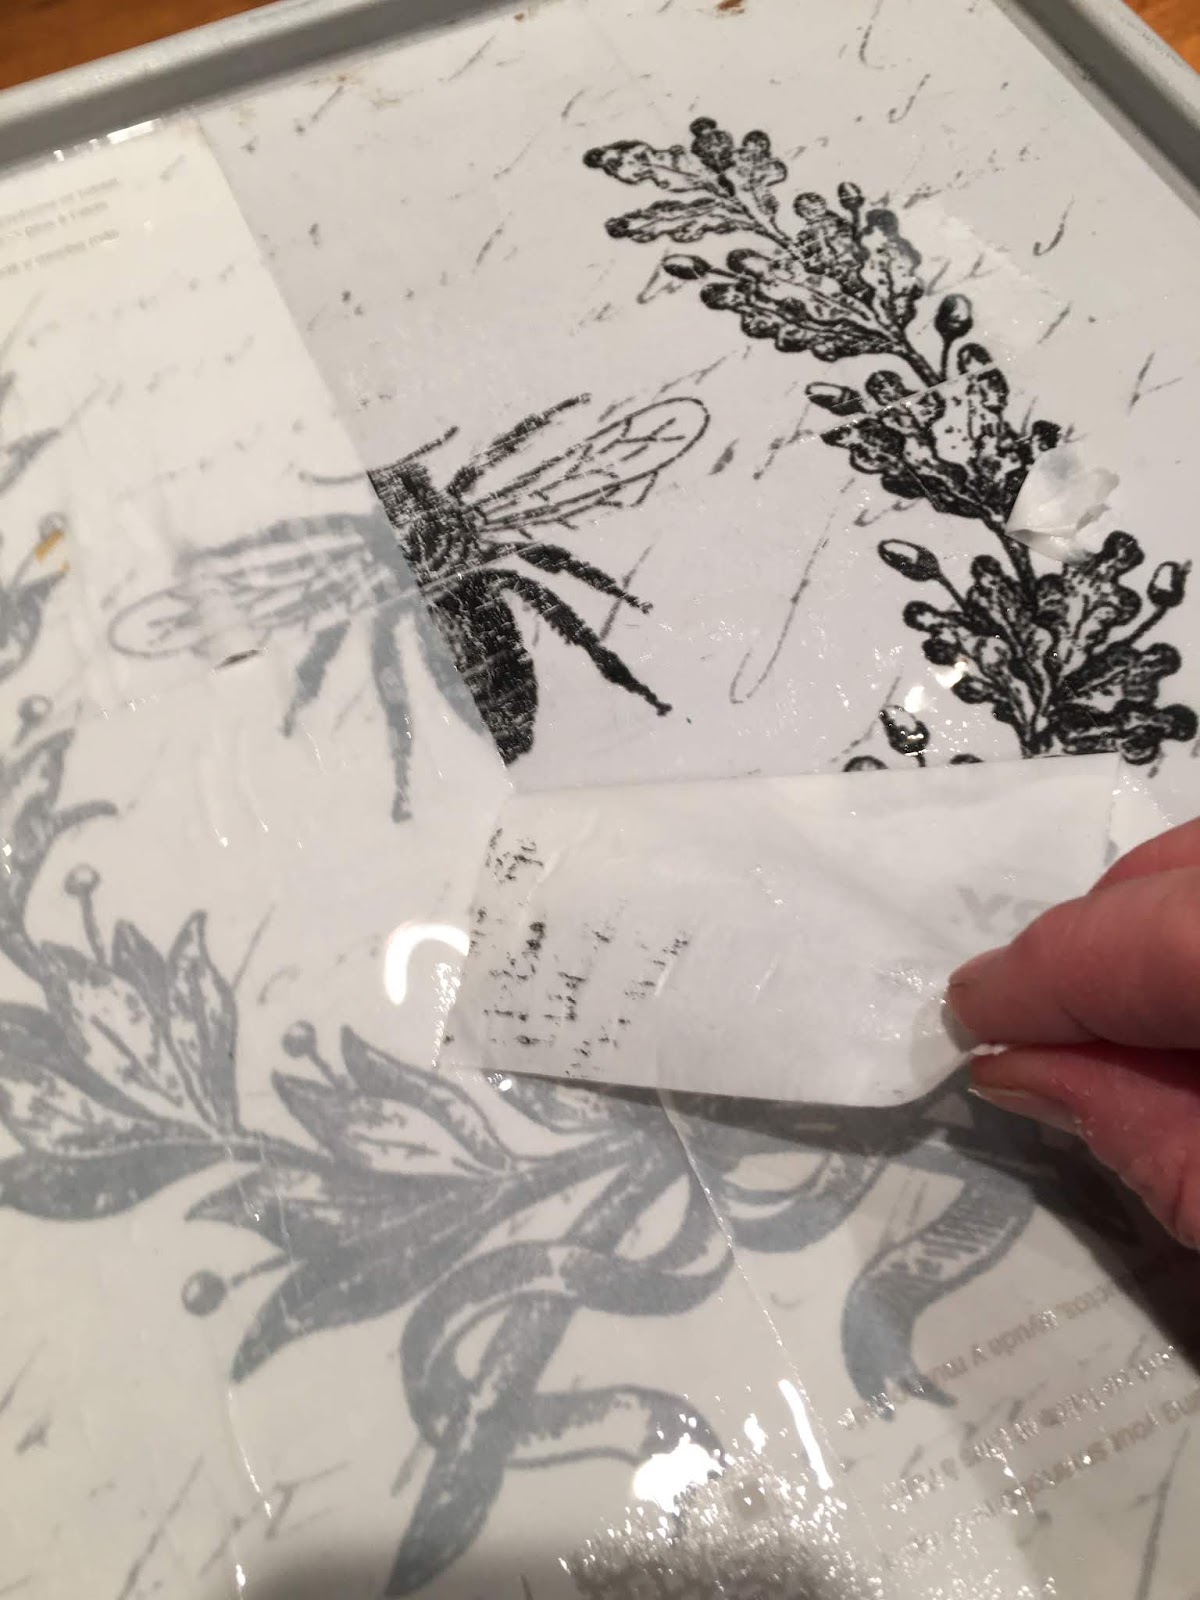 After 24 hours, you are ready to remove the paper to release the image. First, carefully remove any masking tape from the back of the label paper. Then, with a spray bottle of water, spray the back of the label paper until it is translucent. Another approach is to take a wet towel and lay it over the image and let is sit there for a few minutes to saturate the back of the paper. Then begin tugging the paper away from the corners and edges. It should pull off in large pieces. If the ink appears to be pulling up, try spraying that area with water again until the paper fully releases.
So now you should have a (nearly) intact image on your furniture piece. You might be able to see the faint seam lines between paper blocks for your larger image, or even a couple areas where the ink this not transfer. This is normal and could add to the aged/faded look, if that is what you like. But, if you want touch up the seams or any other flaws outside the image the same color chalk paint as what you used to paint the furniture. You can also touch up the image itself with a paint pen in the same shade as the ink.
Seal Your Image
You'll want to protect your image with some sort of top coat. You can use the transfer gel (which will blend with the already tried medium under your image); or poly-acrylic; or clear furniture wax. Do not use colored waxes because it will stick to the dried transfer gel and be obvious. If you'd like to put a colored wax on afterward, just be sure to have a clear barrier between the image and the wax.

And there you have it! My favorite-super-easy DIY image transfer technique. And here is the a photo collage of the finished French Bee accent table from above. If you are interested in this piece, you can purchase it at the this link.
Enjoy!

Copyright 2020 Vintage Veneers Decor LLC